If you’re someone who regularly creates PowerPoint presentations, you know how important it is to ensure that your content should be self-ruling from errors.
PowerPoint has a built-in proofing feature that checks spelling and grammatical errors.
Sometimes you might need to change the proofing language in PowerPoint to ensure your presentation is error-free.
In this tutorial, we’ll show you how to change the proofing language in PowerPoint and provide tips for choosing the correct language.
Why Is It Important to Know? – How to Change Language in Powerpoint
Proofreading is essential to any writing process, including creating PowerPoint presentations.
By changing the proofing language in PowerPoint, you can ensure that your content is free from errors and is easy to understand for your intended audience.
This is particularly important if you are presenting to an international audience who speaks a different language than your default language.
Changing the proofing language can also help you avoid embarrassing errors that undermine the credibility of your presentation.
This blog posr will teach you how to change the spell-check language in PowerPoint.
How to Change Proofing Language in PowerPoint for an Entire Presentation
PowerPoint allows you us to change Proofing Language Settings to all text boxes on a page or all slides simultaneously.
Here is a step-by-step tutorial guide for you on how to change spell-check language in PowerPoint.
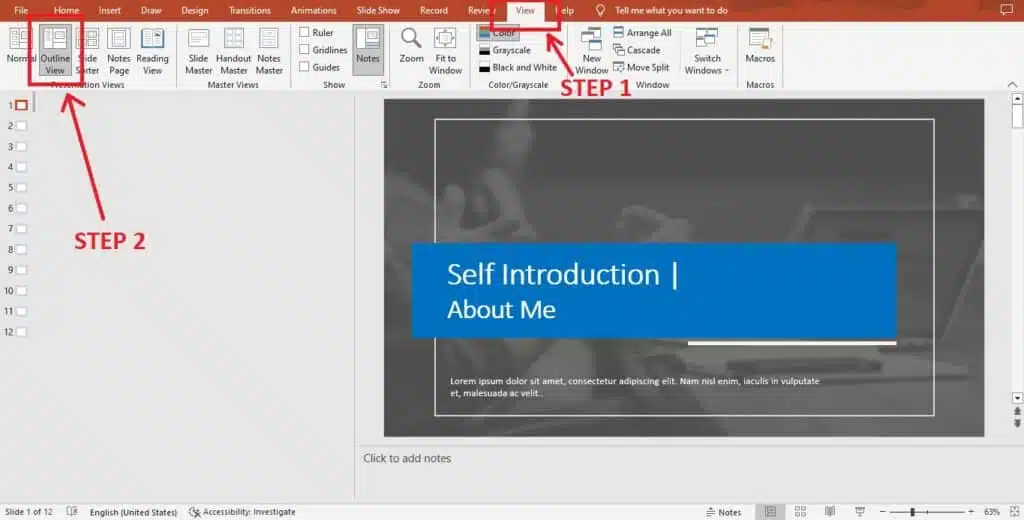
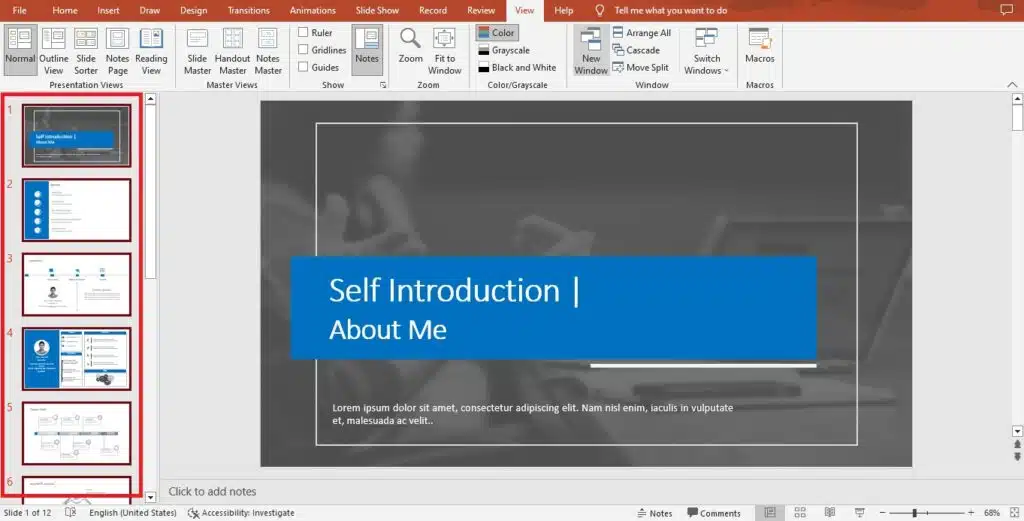
- From the ribbon at the top of the screen, click View | outline.
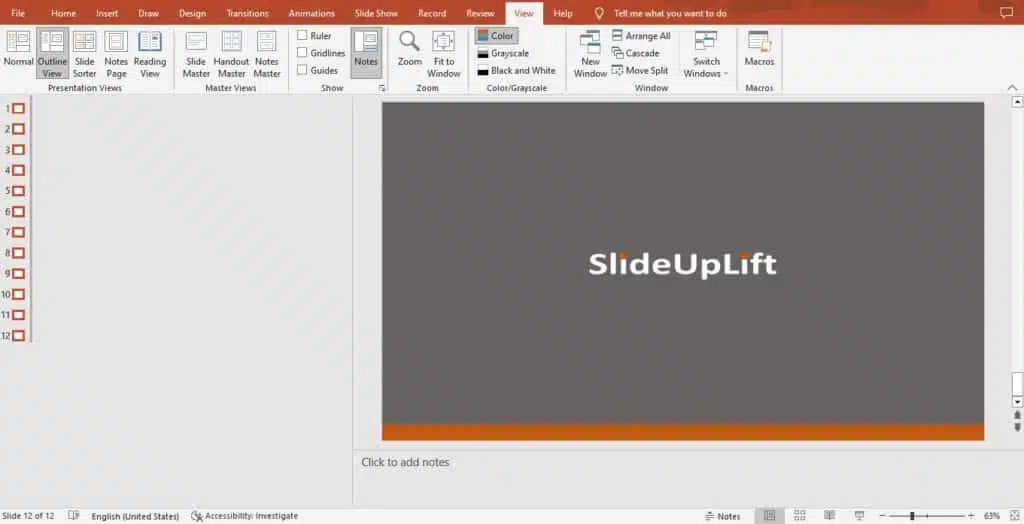
- Then you have to select all slides by pressing ctrl+A.
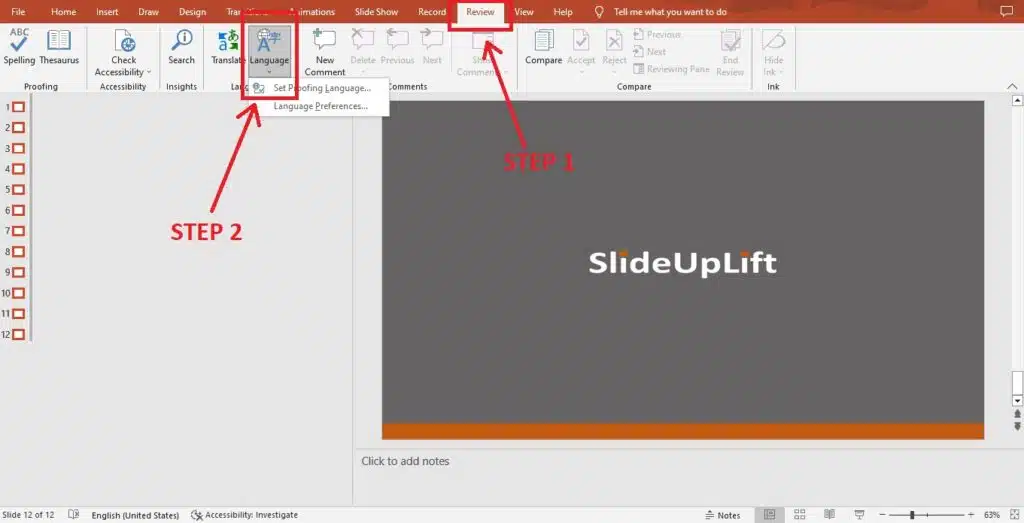
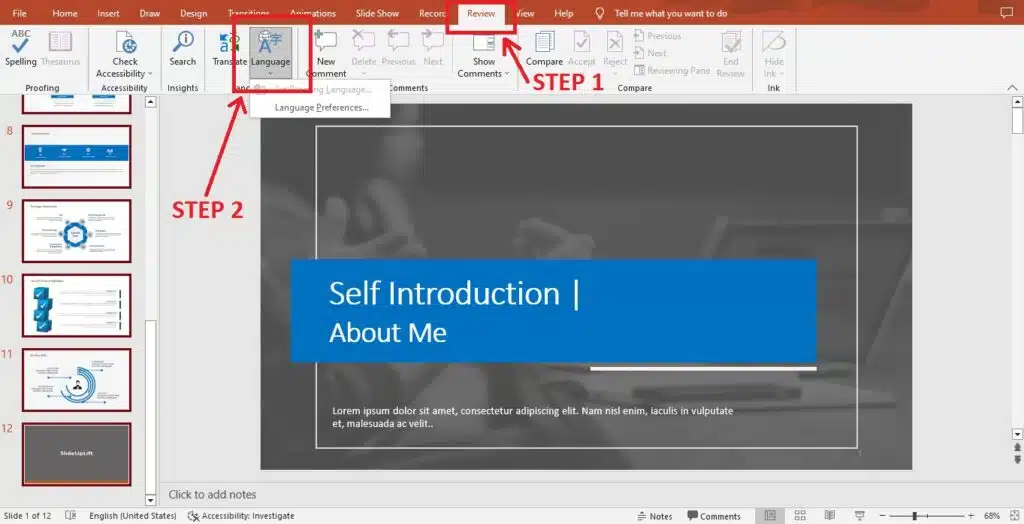
- After that, you can set proofing language by following these steps Review> Language> Set proofing language.
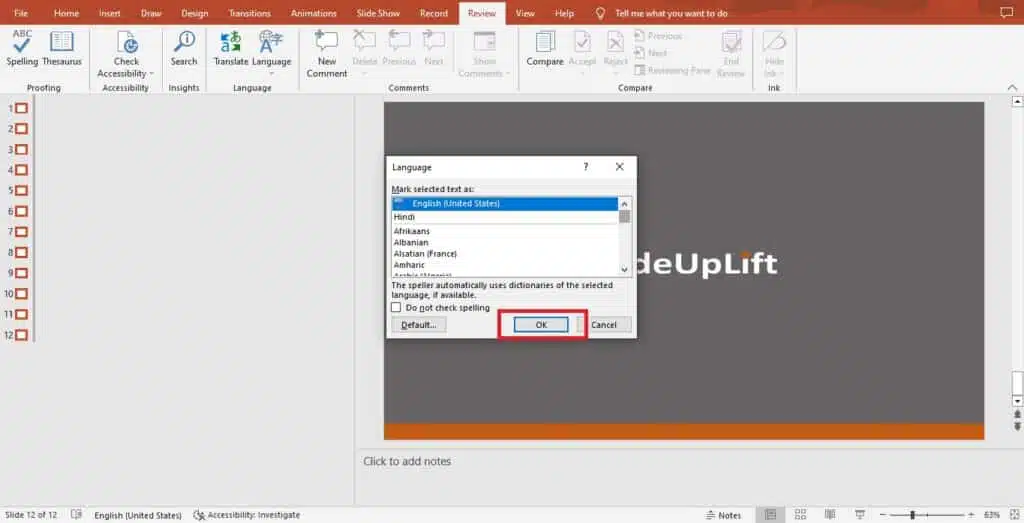
- Select your desired language.
- Then Click “OK”.
Other Methods
By selecting individual text containers
- Navigate to the slide in which you want to change the Proofing language.
- Select all the text by using the ctrl+A keys. If you want to deselect any slide, press shift + object.
- Then click the language in the Status Bar to change the proofing language, there will be a language dialog box to choose your language, and you can repeat the same steps in order to change the proofing language in the future.
By using outline view
- Click outline view
- Select the entire text content by clicking once within the left pane of the Outline View and pressing Ctrl + A to select the entire content of the sheet.
- Click on Review in the ribbon, then on Language. There will be a language drop-down box, where you can choose your language.
- Something to consider is that this method only changes the proofreading language of the text placeholders; it does not change the text boxes or their shapes.
Tips for Choosing the Correct Proofing Language in Powerpoint
Choosing the correct proofing language is important to ensure your presentation is error-free and easy to understand. Here are some PowerPoint proofing language tips:
Tip 1: Consider your audience – If you are presenting to an international audience, using the correct proofing language is important. Consider the primary language of your audience and select the appropriate proofing language.
Tip 2: Choose the most comfortable language – it will be more comfortable for you to use your native language for proofing.
Tip 3: Be aware of regional differences – Some languages have regional differences in spelling and grammar. Be sure to select the correct language based on the region where your audience is located.
What to Do if You Face Any Problem While Changing Proofing Language in Powerpoint
Changing the proofing language in PowerPoint can sometimes result in some issues. If PowerPoint set proofing language is not working, here are some potential issues that you might be facing:
Issue 1: The language you need is unavailable – PowerPoint only supports a limited number of languages for proofing. If the language you need is unavailable, you may need to manually check your presentation for errors.
Issue 2: Formatting changes – Changing the proofing language can sometimes result in formatting changes in your presentation. Be sure to carefully review your presentation after changing the proofing language to ensure all formatting remains intact.
Issue 3: Inconsistencies in language – If you have already typed some text in your presentation, changing the proofing language may result in inconsistencies in language. Be sure to carefully review your presentation for errors after changing the proofing language.
How to Set the Default Proofing Language in PowerPoint
If you want to set a default proofing language for all future presentations, follow these steps:
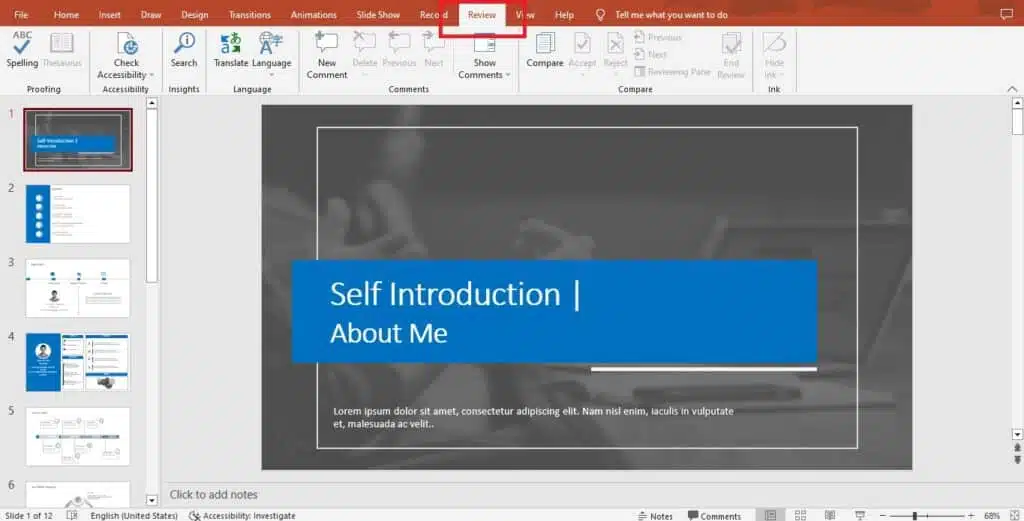
- Step 1: Open PowerPoint and click on the “Review” tab on the ribbon of the top screen.
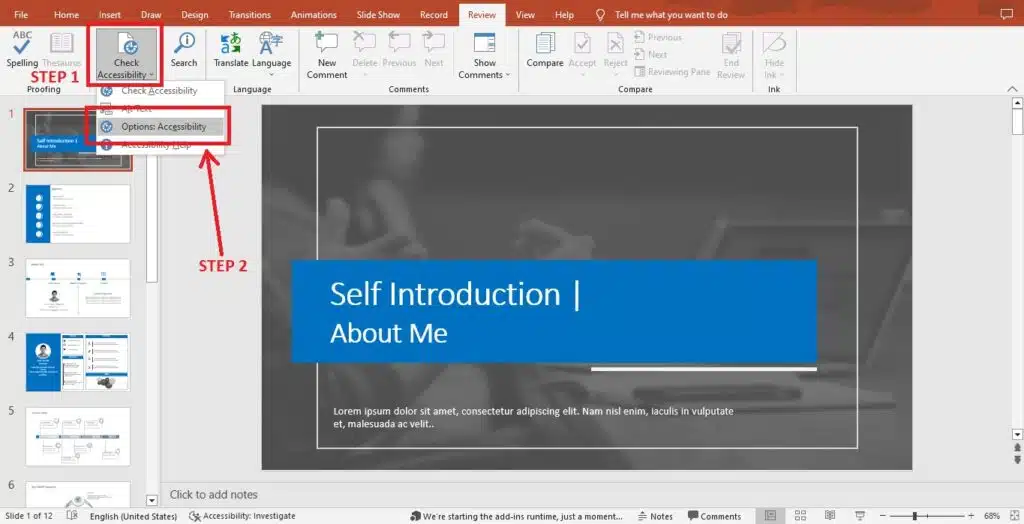
- Step 2: Then click on “Options” in the left-hand pane.
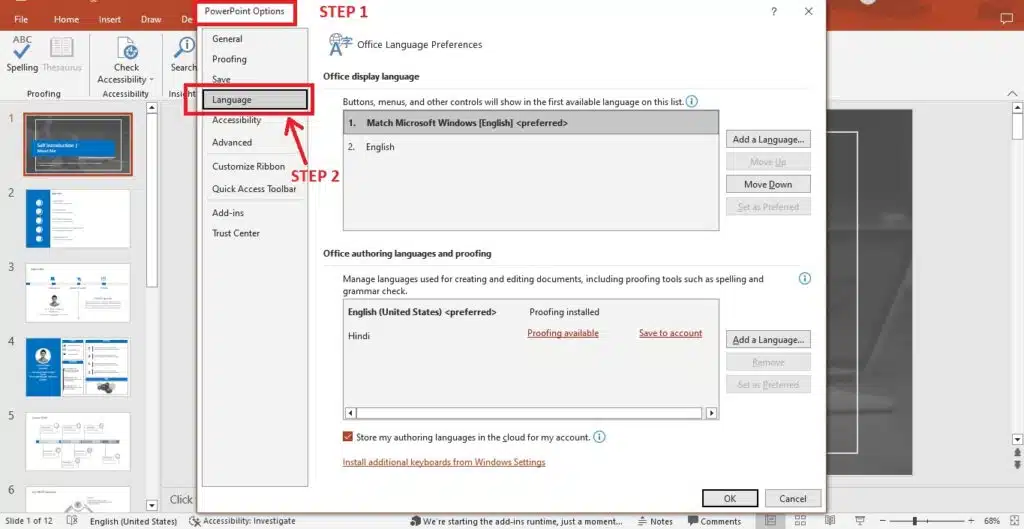
- Step 3: In the dialog box, click “PowerPoint Options” and then “Language” in the left-hand pane.
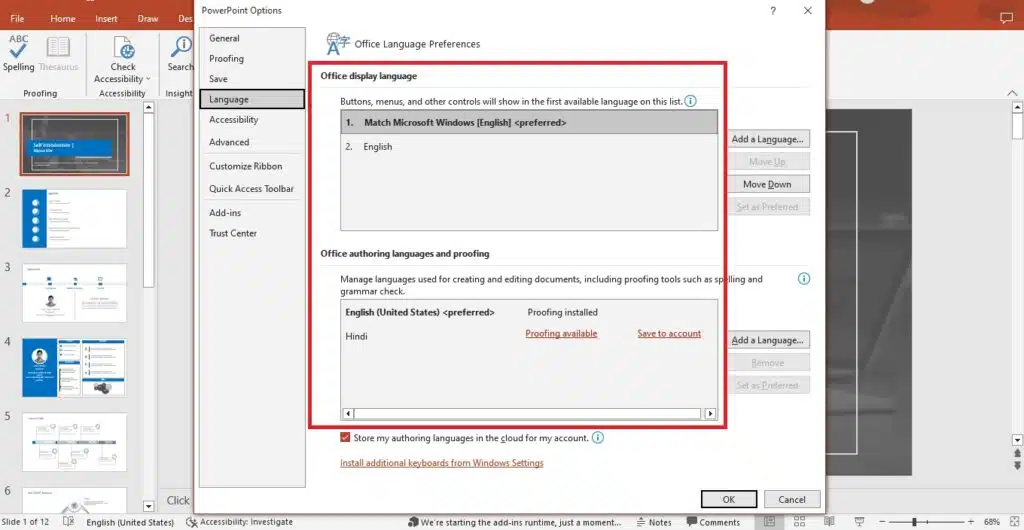
- Step 4: There will be a list of languages where you can choose the default proofing language.
- Step 5: Click “Set As Default” to set the selected language as the default proofing language for all future presentations.
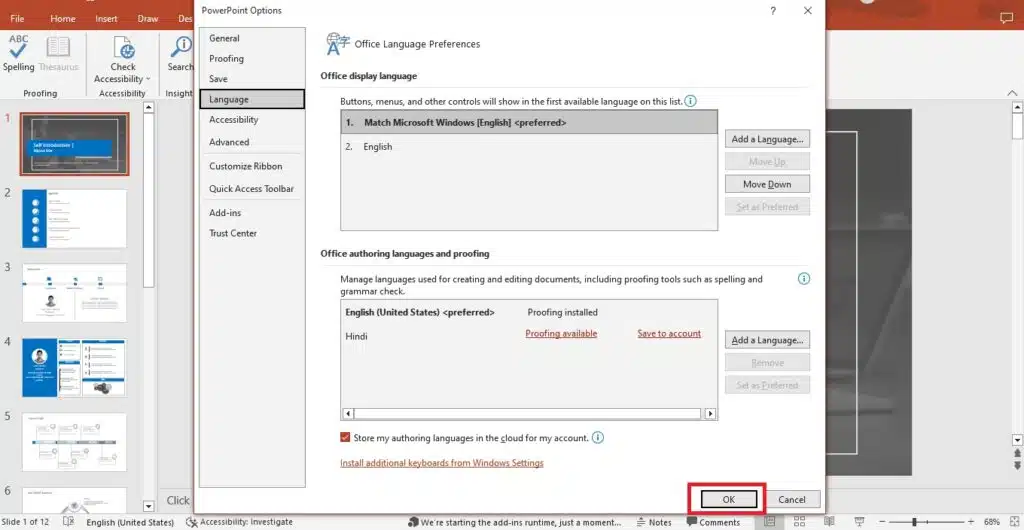
- Step 6: Click “OK” to save the changes.
Advanced Techniques You Need to Know to Change Powerpoint Language
If you need more advanced proofing language settings, PowerPoint provides a range of customization options. Here are some advanced techniques for customizing proofing language settings:
Technique 1: Add or Remove Proofing Languages – PowerPoint allows you to add or remove proofing languages based on your needs. To add or remove proofing languages, go to “File” > “Options” > “Language” and select the “Choose Editing Languages” button. Here, you can select additional languages to add or remove existing languages.
Technique 2: Custom Dictionaries – You can create custom dictionaries to include words specific to your industry or field. And to create a custom dictionary, you have to follow these steps “File” > “Options” > “Proofing” and select “Custom Dictionaries”. You can create a new dictionary or edit the previous one as follows.
Technique 3: AutoCorrect Options – You can use AutoCorrect options to correct common spelling errors or insert special characters automatically. To access the AutoCorrect option, follow these steps: go to “File” > “Options” > “Proofing” and select “AutoCorrect Options”. Here, you can customize AutoCorrect settings based on your needs.
Conclusion
Making Changes in the proofing language in a PowerPoint template is crucial to ensure that your presentation is free from errors and easy to understand.
By following the steps outlined in this tutorial and considering the tips provided, you can choose the correct proofing language and avoid common issues.
Additionally, by exploring advanced customization techniques, you can further enhance your proofing capabilities in PowerPoint.

